This article explains how to add a new GRM Device to the Guest Request Manager module, allowing the colleague to receive Guest Requests on his/her mobile device while on duty.
Step-by-Step Guide
In order to setup new GRM Devices, you must have access to your BPN Maestro account and GRM Device Setting permissions.
Access the GRM Device Settings
To access the GRM device settings, navigate to the BPN Maestro Dashboard, navigate to the left sidebar menu and click on Guest Request Manager > Settings > Device Settings.

Add a new Device
From the Floor Device Settings screen, you can manage Devices Settings like adding new devices, linking the Level 1 Agent to a Level 2 Supervisor, and activating/deactivating the devices.
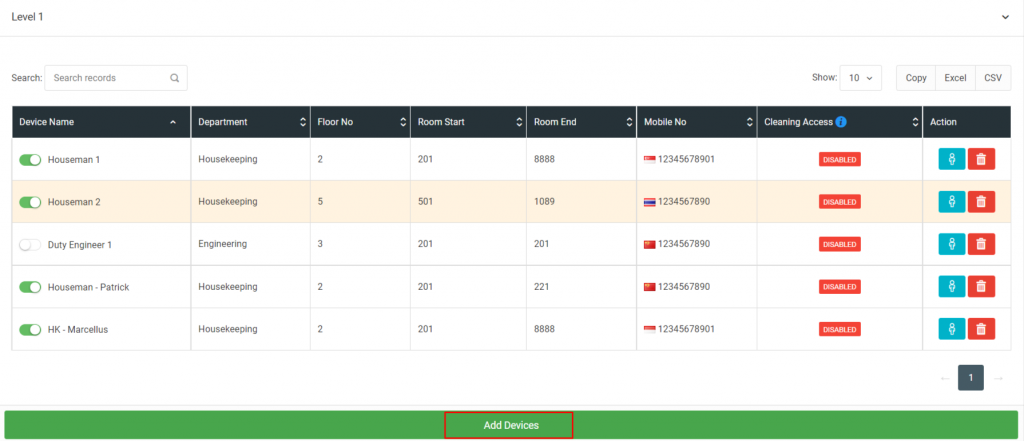
To add a new device, click on Add Device button and then enter all required details including Device Name, Department Name, any additional comment, Mobile Number. You may also add details such as the agents designated floor or room ranges, which will automatically suggest the device for any guest requests on the specified floor / room number.
For example, we are adding a device named Denis Cleaning for the Housekeeping Department from room number 501 to 510 on the floor number 5. Based on this, the GRM will automatically suggest Denis as the agent in-charge of requests from Room 501 to 510, but naturally the creator of the request can change the suggested device when lodging the requests.
Once, you are done with entering all the details, click on the Add button to add the device.
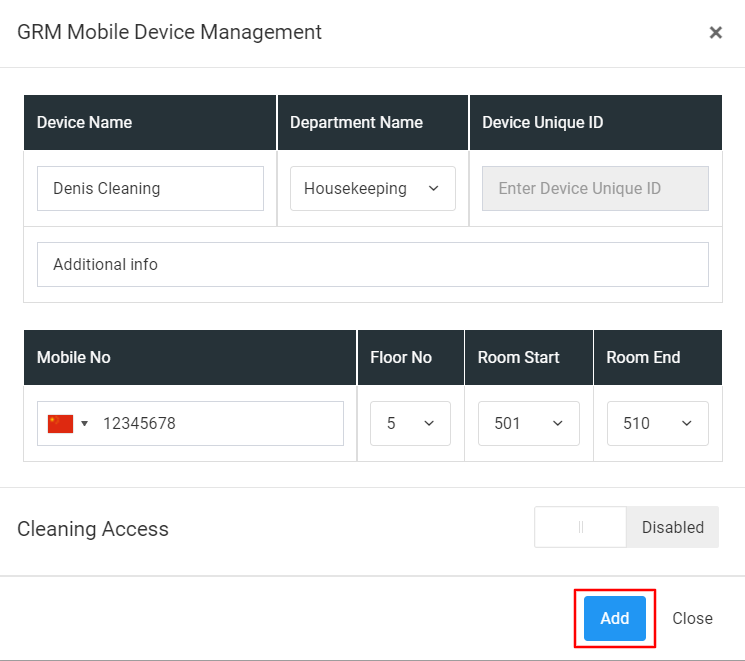
Note: Cleaning Access will only appear if your property has signed-up for the Housekeeping Cleaning module, and by default remain disabled. Enabling this setting will register this device as Room Attendant and allow it to receive Room Cleaning assignments.
Enable Device

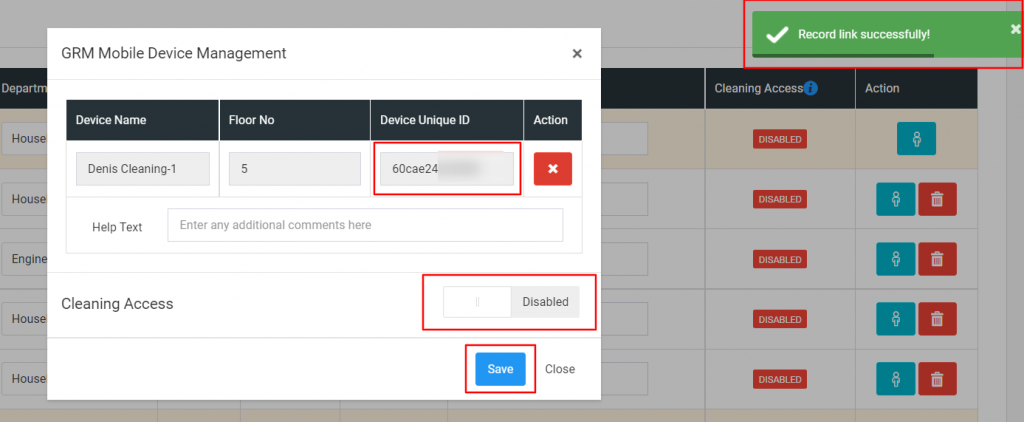
To allow the device to receive GRM requests, use the Toggle Button on the leftmost side to enable / disable the device depending upon the working schedule of the colleague. Only devices that are active (= on duty) can receive guest requests from the GRM. A green light will indicate that the device is active and the user / colleague is ready to receive requests.
To enable the device, click on the Toggle Button on the left side. And click on Confirm to save changes.
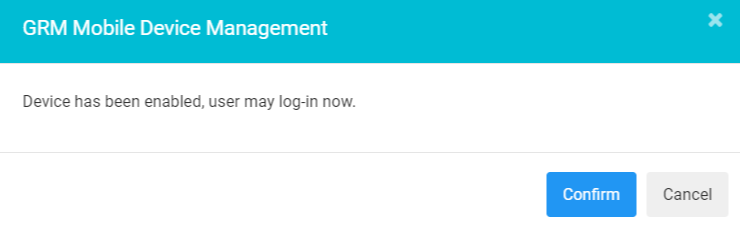
IMPORTANT: Once we enable the device, the device will be activated, but the device will not be able to receive requests, as it is still not linked to a Level 2 device. Check the below warning message that appeared on the screen.

It is required that each L1 device has a valid link to a Level 2 Supervisor device in order to ensure proper escalation of guest requests. Check How to link GRM Devices for more details on how to link Level 1 colleagues to Level 2 supervisors and request escalation system.
Once the device is linked to a L2 Supervisor, your colleague will be able to receive Guest Requests in real-time via his/her mobile device while on duty, check how to login into GRM Device with a Device ID.