The Guest Request Manager module has set a time limit for every delivery / task to be followed up. Every Level 1 colleague must be assigned to a Level 2 Supervisor, who will receive an alert message in case any guest requests are overdue.
This article will explain how to link devices, allowing the colleague to receive Guest Requests on his/her mobile device while on duty and manage to whom any delayed request shall be escalated to. For more details on adding a new GRM device, please see How to add a new GRM Device.
Step-by-Step Guide
In order to link GRM Devices, you must have access to your BPN Maestro account and GRM Device Settings permissions.
Access the GRM Device Settings
To access the GRM device settings, navigate to the BPN Maestro Dashboard, navigate to the left sidebar menu and click on Guest Request Manager > Settings > Device Settings.

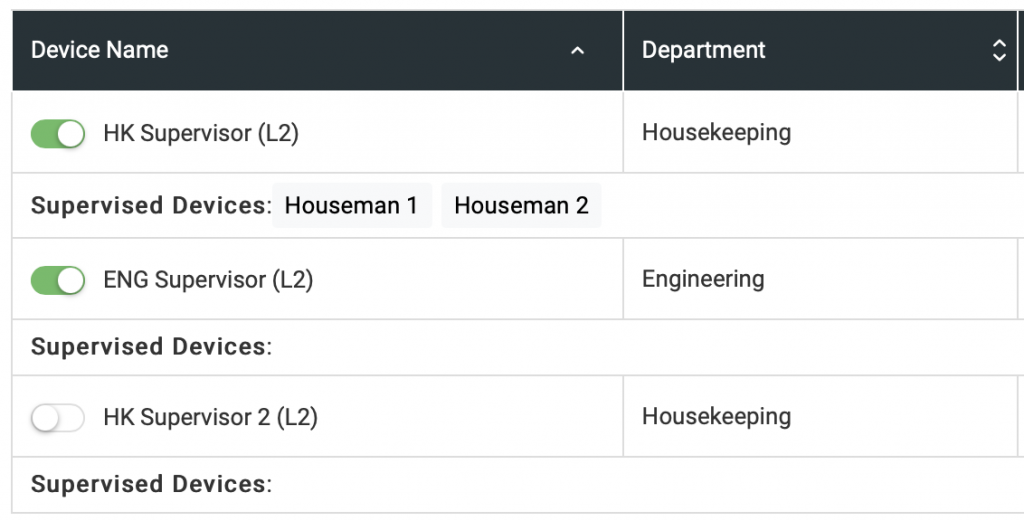
Add Level 2 Device
You must have a Level 2 Device added in order for the Level 1 Device to be linked. If you already have a Level 2 device activated, please jump directly to the fifth step to learn how to link them.
If you have not added a Level 2 device yet, navigate to the Level 2 section on the Device Settings screen.
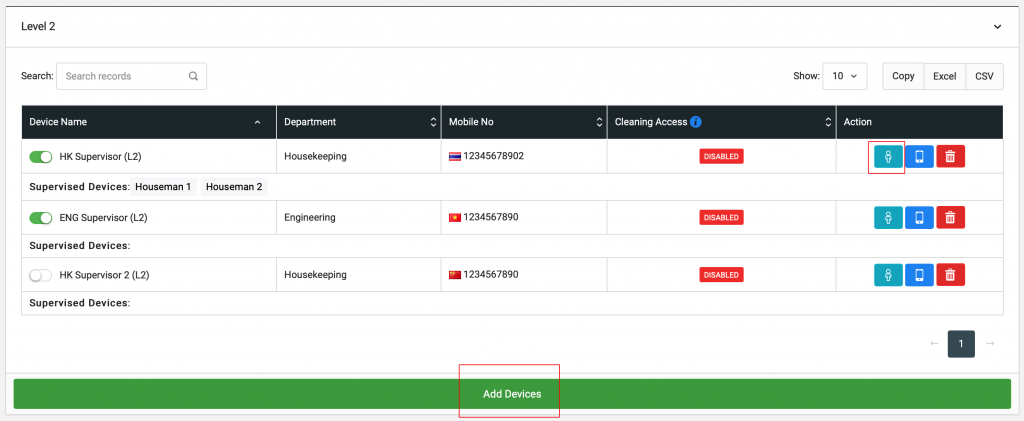
Click on Add Device button and then enter all the details including Device Name, Department, and Mobile number. Once the details are entered, click on the Update button to add the device.
Note: You may see a switch for granting Cleaning Access to a particular device, this is only applicable of your property purchased the Housekeeping Cleaning module, allowing you to send Room Cleaning Assignments to this device. You can enable it depending upon your requirement.
Enable Device
Just like we did with Level 1 devices, to enable the device simply click on the Toggle Button on the left side.
Link GRM Devices
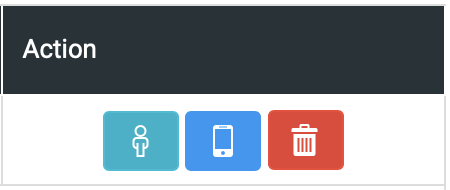
With the device enabled, you will not be able to receive alerts yet as there are no Level 1 devices linked with this device yet. To link a specific Level 1 device with the newly added Level 2 device, click on the blue Link Device on the right.
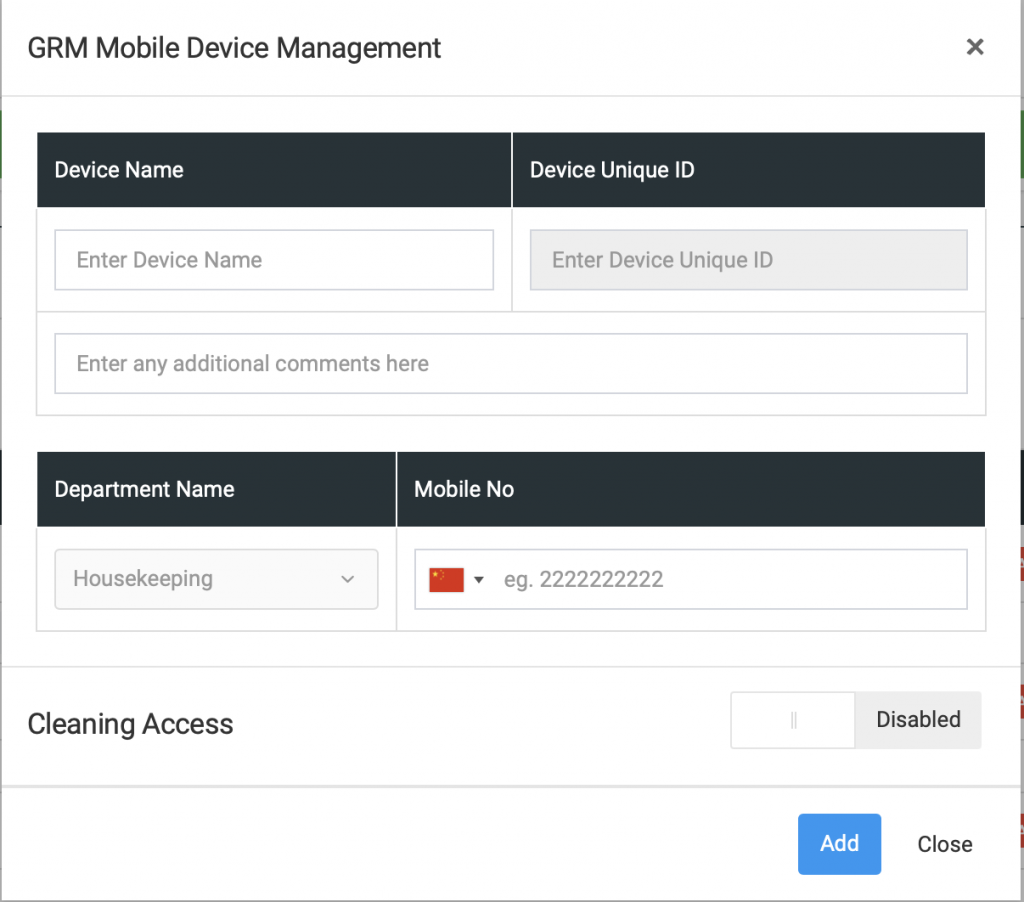
In the GRM Mobile Device Management popup, click on Select Devices which will show a list of all available Level 1 devices. Select one or more devices who the Level 2 Supervisor should oversee and then click on the Save button to save changes.
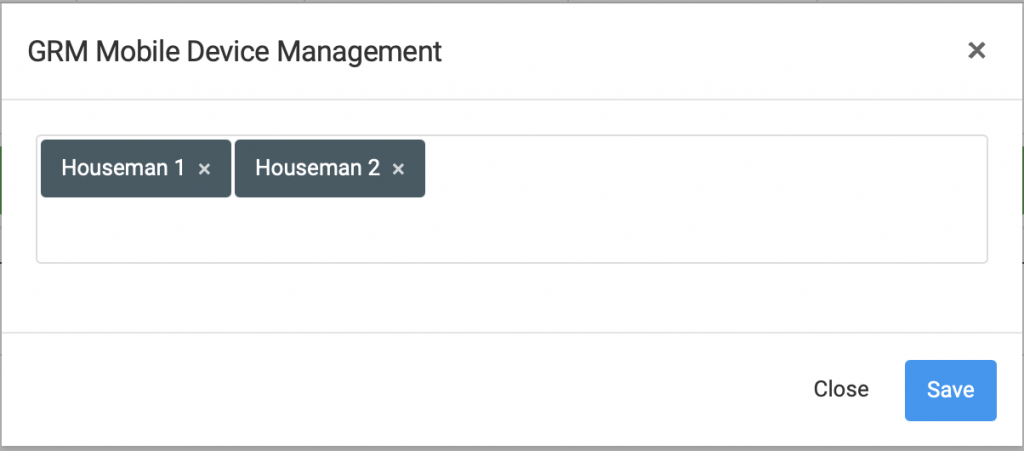
Note: A Level 2 device can only be linked to devices of the same department, for example, a Level 2 device belonging to the Housekeeping department will only see Level 1 devices in the dropdown list.
Optional – Link Level 2 Device to Level 3 Device
Generally, a 2-Level Escalation is activated by default, allowing you to escalate delayed requests from Level 1 to Level 2. Optionally, users may also add a Level 3 device which needs to be linked to Level 2 devices and receive any delayed requests in case Level 2 did not complete them on time. This Level 3 is optional and needs to be activated via the Active / Inactive radio button in the Level 3 device table.
To add and enable a Level 3 device, select Active from the top-right Level 3 table, and repeat the procedure above to link Level 2 devices you wish to manage.
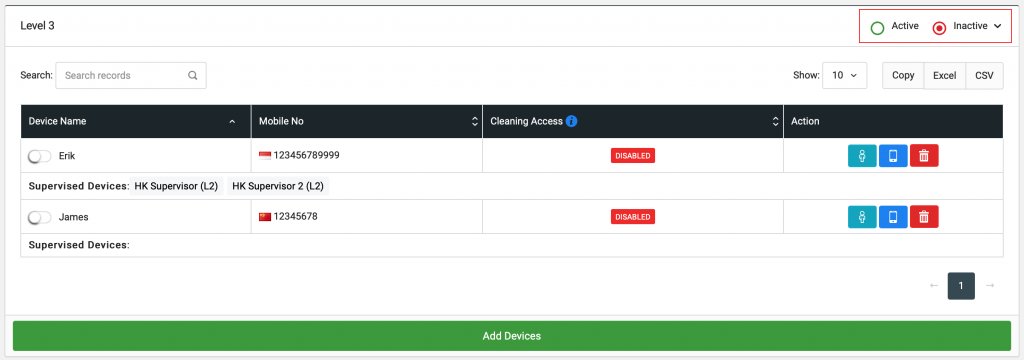
Note: If Level 3 Devices are activated, the entry will be raised only if the Level 2 Device has not completed the request on time.
That’s it, your L1, L2 and L3 devices are now linked.